Manage Report Schedules
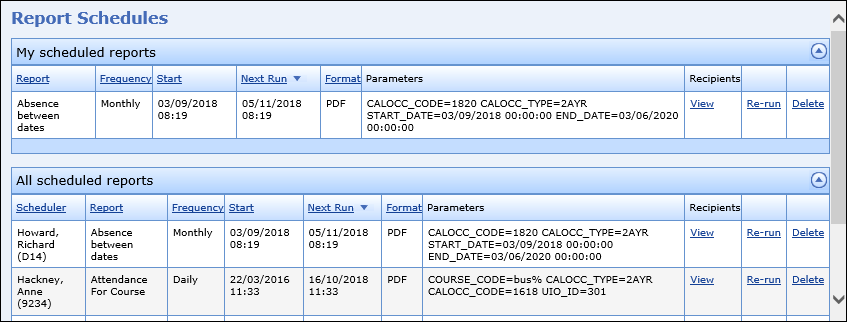
You can set up schedules for reports to be run and emailed to staff on a regular basis using ebs Reports. Report schedules can then be viewed, and re-run on the Report Schedules page.
To manage report schedules, you can:
To view the recipients of scheduled reports:
-
Access the Report Schedules page. See Schedules for more information.
-
Click the View option in the Recipients column for the required scheduled report.

The All Recipients window is displayed, with the recipients for the scheduled report listed.

-
Access the Report Schedules page. See Schedules for more information.

-
Click the Re-run option for the required scheduled report.

This will display the selected report.
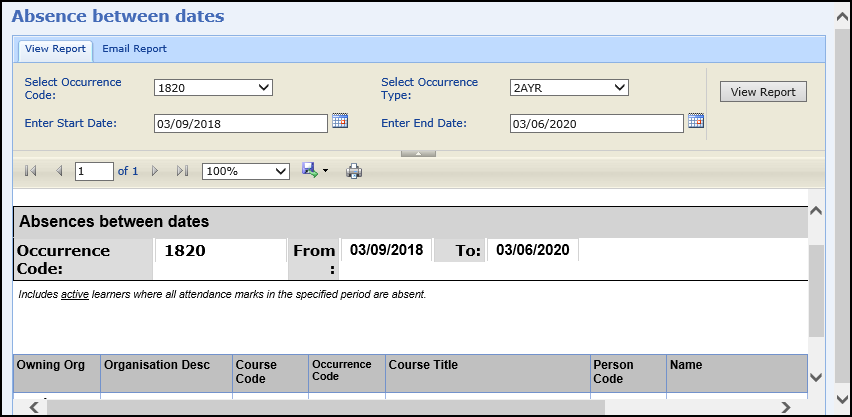
To set up a report schedule:
-
Select the report you want to create a schedule for in the navigation pane.
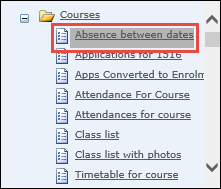
The report is displayed in the main section of the screen.
Note: Some reports will require a parameter to be defined before displaying the report information.

-
Click the Email Report tab.

The Email Details page is displayed.
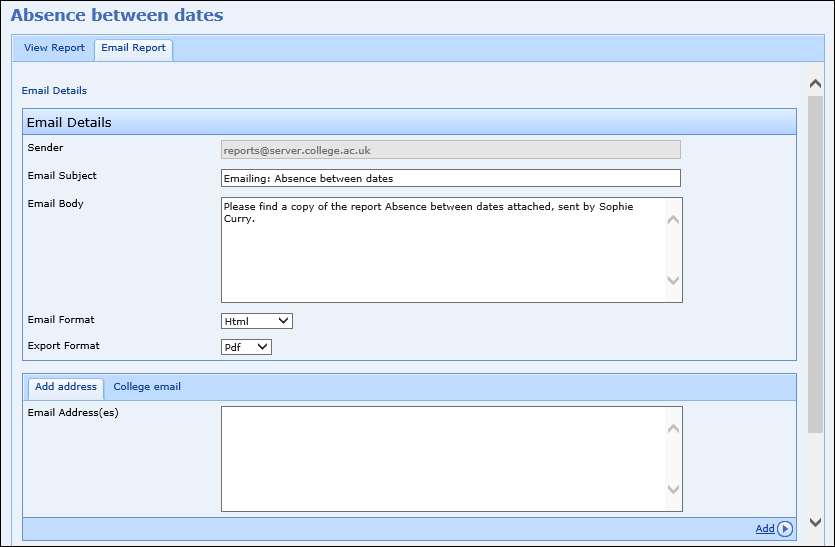
- Enter the required details for the email.
-
Click the Create Schedule button at the bottom of the page.

The Schedule Details page is displayed.
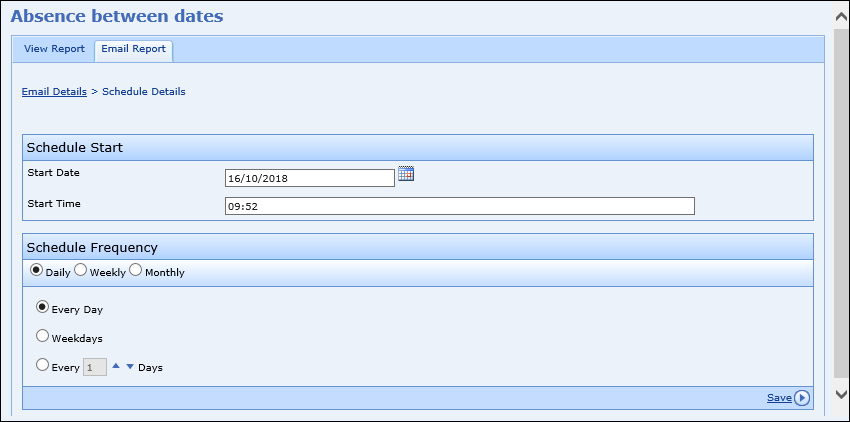
- Enter the required details for the report schedule.
The fields on the Schedule Details page are described in the following table.
| This field | Holds this information... |
|---|---|
| Start Date | The start date for the report schedule. Enter the start date for the schedule, or click the Calendar button to display the calendar where you can select the required date. |
| Start Time | The start time for the report schedule. |
| Schedule Frequency | The frequency of the report schedule. Select the required options to schedule the report to run daily, weekly or monthly. |
-
Click the Save button at the bottom of the page.
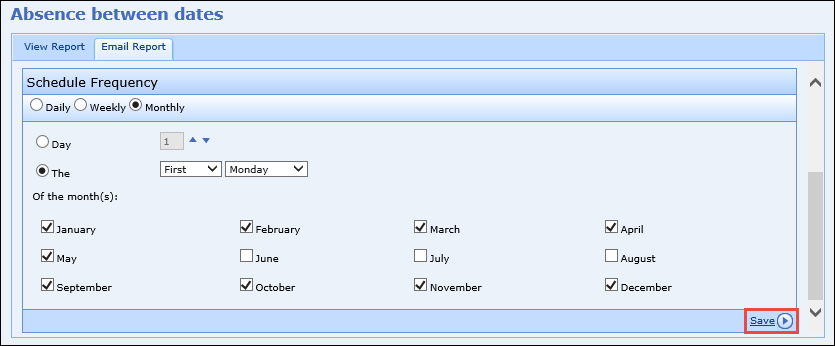
The report schedule is saved.
You can edit report schedules in Workflow Manager only providing you have the Workflow Administrator role assigned and a valid EBS4Workflow licence.
To edit a report schedule:
-
Click the Workflow Manager button on the System ribbon in ebs: central.

The Workflow Manager screen is displayed.

-
Expand the Schedule Triggers node in the Workflow Triggers pane.
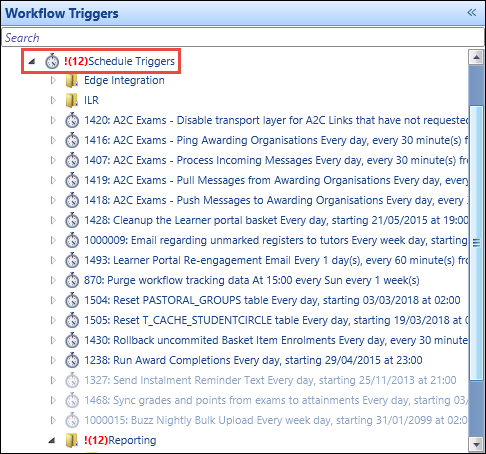
-
In the Reporting folder, select the report schedule you want to edit.

The details of the report schedule are displayed in the Schedule pane on the right-hand side of the screen.
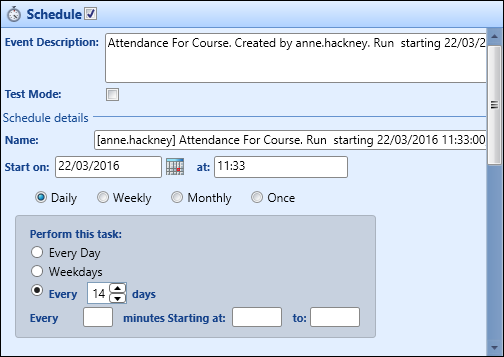
- Make the required changes to the report schedule.
The fields on the Schedule pane are described in the following table.
| This field | Holds this information... |
|---|---|
| Schedule | Select the check box to make the report schedule live. |
| Event Description | The description of the report schedule. |
| Test Mode | Whether to enable test mode. |
| Name | The name of the report schedule. |
| Start On | The start date for the report schedule. Enter the start date for the schedule, or click the Calendar button to display the calendar where you can select the required date. |
| Start At | The start time for the report schedule. |
| Schedule Frequency | The frequency of the report schedule. Select the required check boxes to schedule the report to run daily, weekly, monthly or once. |
-
Click Save.
The report schedule is updated.
-
Access the Report Schedules page. See Schedules for more information.

-
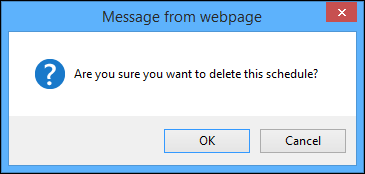
Click the Delete option for the required scheduled report.

The following message is displayed.
-
Click OK.
The report schedule is deleted and removed from the list of scheduled reports.